Airstream Alley III
When photographing the Airstream in a downtown alley with Earle (he was shooting for the #FP4Party) I also had the Olympus XA in my pocket. It was loaded with JCH Street Pan 400, a newish film that I had not used before.
I just finished the roll and scanned it yesterday. I like this film, it is quite contrasty, the grain is very good, details come through well and it is a good speed for the winter. It has a very thin emulsion and this is a problem because the local film processing store that does black and white cannot scan the thin emulsions. Their scanner is rejecting such films, which presumably means it needs an adjustment. Anyway, it forced me back to the scanner.
Fortunately, it scans on my flat-bed scanner really nicely – it lies flat and is easy to load in the film holders, and does not require a great deal of fussing with the settings to get a satisfactory scan.
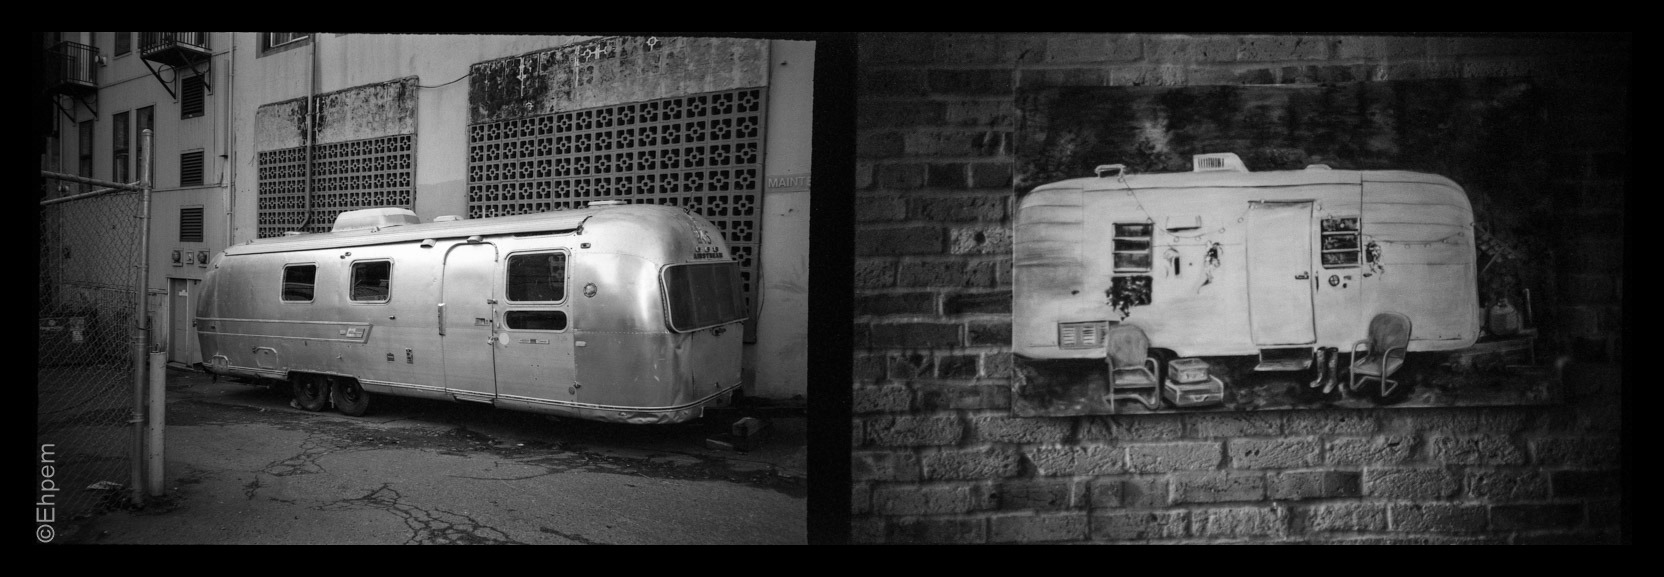
The advantage of doing the scanning myself is that it reminded me that I had made this in-camera diptych to be scanned as a single image. After shooting in the alley we stopped by a coffee shop which happened to have several paintings of trailers. This one kind of looks like an Airstream and I remembered that the previous image on this roll was from the alley and thus this photograph.
The images both can stand alone, as you can see below, but I like this diptych too.
 .
.
Olympus XA, JCH Street Pan 400, developed commercially, scanned at home.


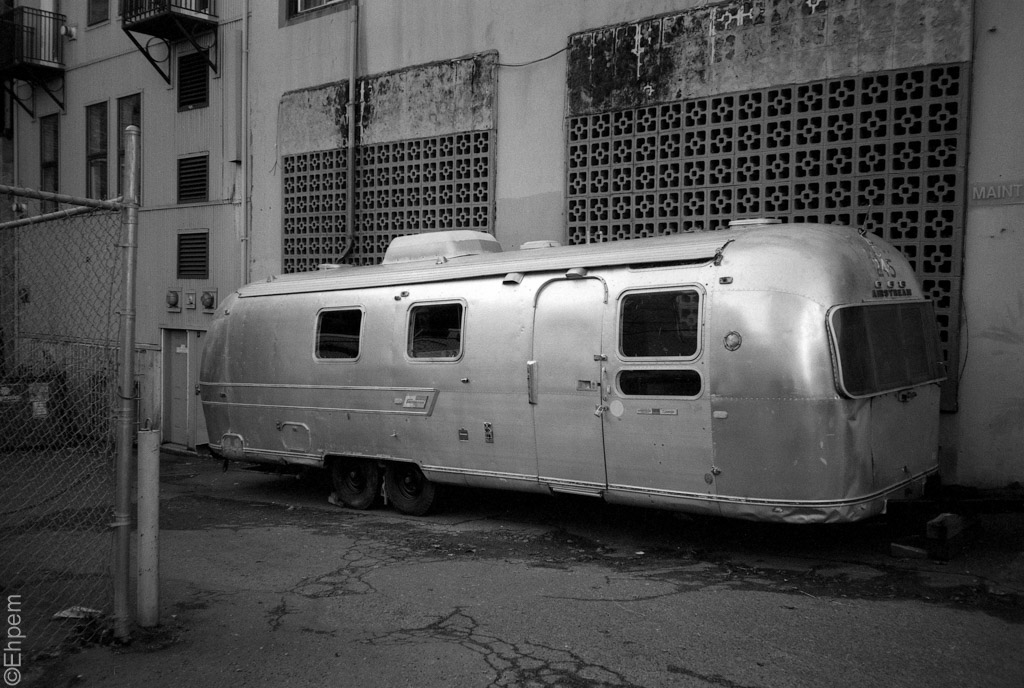
I’m curious to know if you adjusted the real airstream photo after scanning much – the background is so much darker & less contrasty than the airstream. It’s a great effect. The roundness of the airstream compared to the flat shapes in the background is emphasized with all that nice highlighting on it – nice!
LikeLiked by 1 person
Hi Lynn, thanks for the great questions. The answer to that question lies in three or four places, and is much longer than perhaps you want, but here goes.
The first is the film, which is quite high contrast and especially sensitive in the red part of the spectrum (read more about it here if you want: https://www.japancamerahunter.com/shop/jch-streetpan-400-film/). Note that much of the background brickwork has red tones and the light was quite heavy in the yellows too, even in the shaded areas, so this could contribute to how the scene is rendered.
The second might be the lens/light combination – the coatings on the lens of any camera will render different colours and light intensity in different ways.
The third is how the scanner handles the film, and how I adjusted different levels in the scanner (I don’t keep a record of exact levels, but I adjust each image with a similar work flow that accommodates differences in the exposures and thus effect the highlights, shadows, mid-tones and contrast).
The fourth is what I did to the scans once they were done, though really it was not much and probably has not contributed a lot to the effect you are noticing.
For the single real airstream photo (second image) I did essentially nothing, other than the adjustments I made when setting up the scan, but they were not substantially different from other single images on the roll. The two individual shots show what I did to the images on their own as opposed to the diptych – for the real airstream I gave the barest touch of clarity (+5 in Lightroom) and even less tweak on the shadows (-2) and that is all.
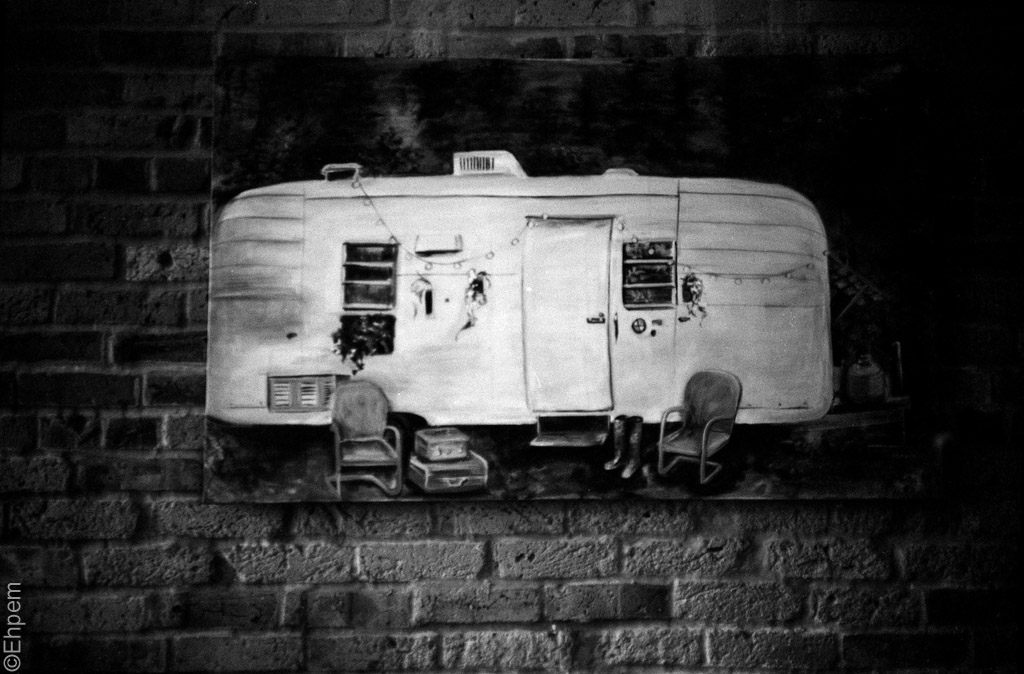
On the single painting picture (last image in this post) I had to do more as it was not as good an exposure/scan – I pulled the highlights down a touch to bring detail into the trailer (-3) and brought the shadows up quite a bit to bring some detail into the wall (+19) and added a dose of clarity to compensate for an overall quite soft image (+8). That was all for those two images, but for the diptych, which is another single image I did different work to bring the two halves a bit closer together in feel.
Because it was a different scan, and the settings for the scan were not based on the previous two images (I lost them when I changed another setting that allowed me to scan more than one frame at a time) I had more work to do because it was a bit underexposed in the scanner. I brought the highlights up (+13), the shadows (+21) and the clarity (+23). (probably if I had just added to the exposure value I would not have needed to do much for the highlights or shadows and less for the clarity). In the tone curve I tweaked the darks (+4). Then for the right half of the image (painting frame) I applied a graduated filter (without gradation) that covered the whole frame from right to left. It increased the exposure by 0.6, the contrast by +8, the highlights by +1, the clarity by +11, the sharpness by +8. And then, because at f2.8 this camera vignettes heavily, and had done so on the painting frame, I added a vignette (-67, midpoint +55) to the whole thing so that there is a bit of balance at the right and left edges. The existing vignette on the right was sufficiently dark to not be changed much when I did this.
Once these changes were made, I exported the file and in picasaweb added the border to match the central bar (I wish my version of Lightroom allowed for borders to be added). My scanner crops the borders very close to the image edge, often cropping all the black away on one long edge. So when scanning I include as much as I can of the black surrounds for these multiple images, and then crop the outside to a sliver of the original black border – this preserves the uneven corners and other characteristics of a negative and makes the artificial border look more realistic.
So, it sounds like I did a lot to the diptych, but if I had done a good scan, I probably could have worked with very minor tweaks to the shadows and clarity, and similar values with the graduated filter for the right half, and the vignette.
I hope this explanation was not vertigo inducing and you can get on with the rest of your day without physical support 🙂
LikeLike