
Repairing Ansco Color Clipper

I found an Ansco Color Clipper in a thrift store last week. It seemed like an interesting camera, though very basic and quite cheaply made. But it appeared to work and was affordable so why not take it home? When I got it home and tried to clean the lens I realised that the dust was on the inside and that there was a lot more than enough dust to prevent the camera from being useful (see image below). Getting the camera apart to clean the dust meant removing some rivets, a task I was hesitant to tackle for a few days. This post is about the camera, and the process of getting it apart, and back together.

The Camera
The Color Clipper seems to have first came into production in 1950. Many on-line references point to the 1940s, often the early 1940s, but I think they are confusing this camera with its predecessor the Ansco Clipper. The styling also suggests a 50s origin. Until I find a definitive source, I am asserting the 1950s.
It has a metal box bellows that slides out of the camera when two clips are pressed and pulled on the sides of the lens assembly. The Color Clipper uses 120 film in 6×6 format, which was one of the first things that attracted my interest since it is such a pain to respool onto 620 or other film sizes. It is an extremely basic camera with a single shutter speed and two apertures, However, it is improved over the Ansco Clipper by having a double exposure lock on the shutter, and scale focus on the lens, it takes 120 film instead of 616 and has two apertures instead of one.
The shutter release (the big red button that is exposed when the bellows are pulled out) stays depressed once a picture is taken. The release is re-activated as soon as one starts to wind the film ahead. However, if you are interested in double exposures, you can just pull the shutter release button up into position and make another exposure. It is a pretty handy feature with admirably simple engineering. And obviously, when the camera is collapsed, the shutter cannot be accessed or accidentally depressed.
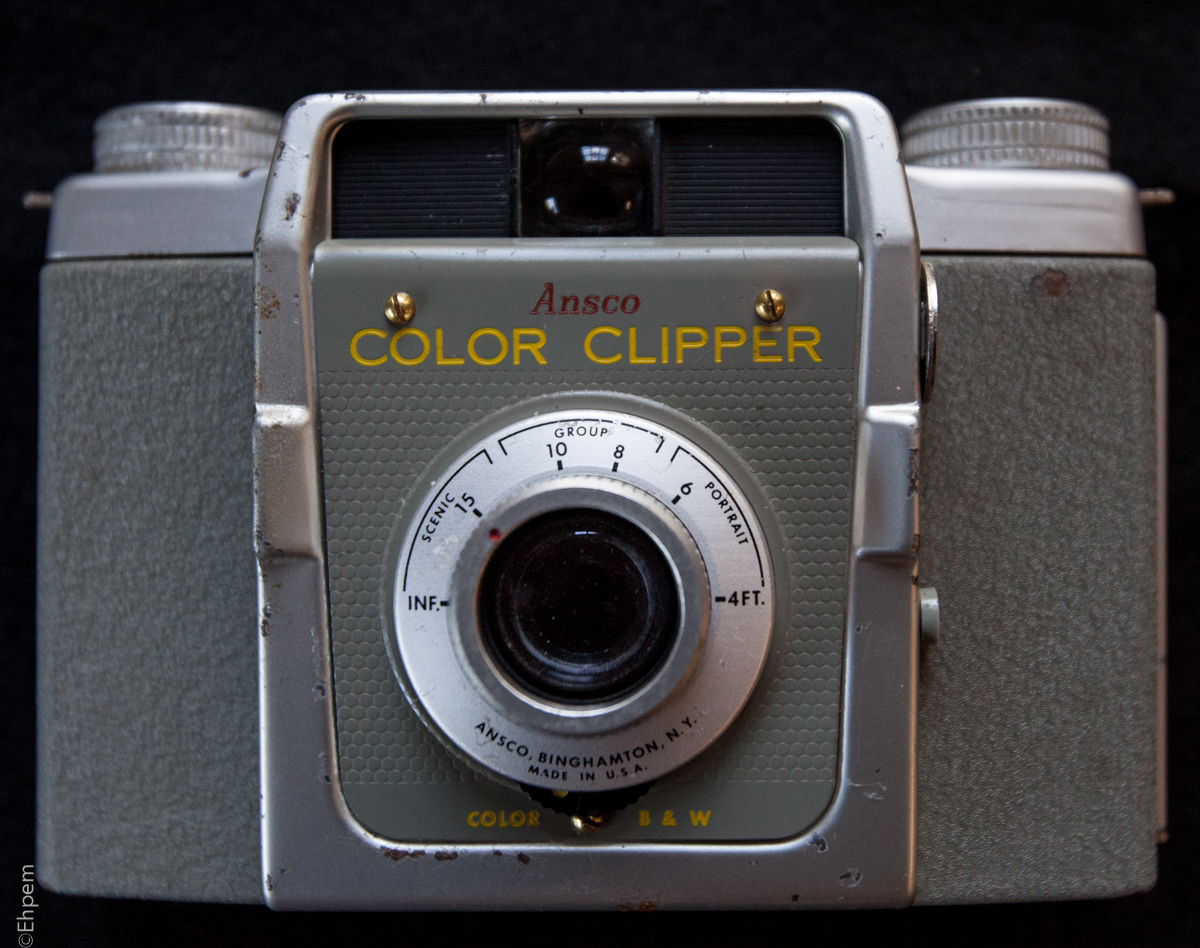
The scale focus involves rotating the outer ring of the lens which moves the outer element in and out. A red dot on the outside of the lens assembly is used to set the distance. The scale is marked in feet (4 ft to infinity) and the distances are also grouped and labelled “Portrait” (4 to ~6.5 ft), “Group” (~6.5 to ~12 ft) and “Scenic” (~12 ft to infinity).
Beneath the lens is a dial which is turned to change the aperture. A yellow dot on the dial is pointed at either “Color” or “B&W” which changes the aperture. According to the manual, these labels refer to two recommended films – Ansco All Weather Pan and Anscochrome. The Pan was, as far as I can figure out, ASA125 and the Chrome ASA32. This indicates that there is probably a two stop difference between the apertures.
The folks at Camera Traders measured the shutter speed at 1/30th though I have seen other sources which say theirs are 1/25th, 1/40th and 1/50th. Perhaps it was designed to shoot at 1/60th and the springs get tired, or perhaps there was up to a stop or so of difference from one camera to the next. Knowing the manufactured shutter speed is only important if one wants to figure out what the f-stops are most likely to be since there is no documentation that I can find from Ansco.
If the shutter was intended to be 1/30th and if the Anscochrome was ISO32, then the Sunny 16 rule would indicate that this aperture is f/16 and so the B&W setting at two more stops would be f/32. If the shutter was designed to work at 1/60th, then these would be f/11 and f/22. These values make sense as the similarly simple Kodak Brownies of this era range from 1/35th to 1/50th and f/11 to f/32. The manual recommends a yellow filter for black and white which could complicate these calculations. However, it had to be purchased separately so perhaps it was accounted for with the film having a forgiving exposure latitude rather than via aperture diameter.
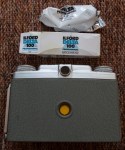
The camera can be fitted with a flash which joins to the side of the lens unit but only when the bellows are extended. This flash was used on several Ansco models (for instance the Flex II) so perhaps is more commonly available than usual for these older flashes. My camera came with the flash unit, and while not tested, it seems in good condition even though batteries were in it and leaked a bit; they did not leak on anything that matters.
There is no tripod mount, so it is hand holding all the way, which at 1/30th is doable with care. I am not sure what focal length the lens has but it doesn’t seem wide enough to compensate for slight camera motion.

The Repairs
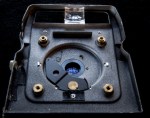
At first it looks like dismantling the camera to get at the lens would be a simple matter. There are three screws on the inside of the camera at the end of the bellows surrounding the lens – these screws attach the lens board to the bellows. Some owners of this camera might find four screws because there are four threaded mounts to receive screws, and four depressed areas only three of which have holes on my camera. It looks as if one hole might not have been drilled during manufacture.

Detail showing three screws that need to be removed first
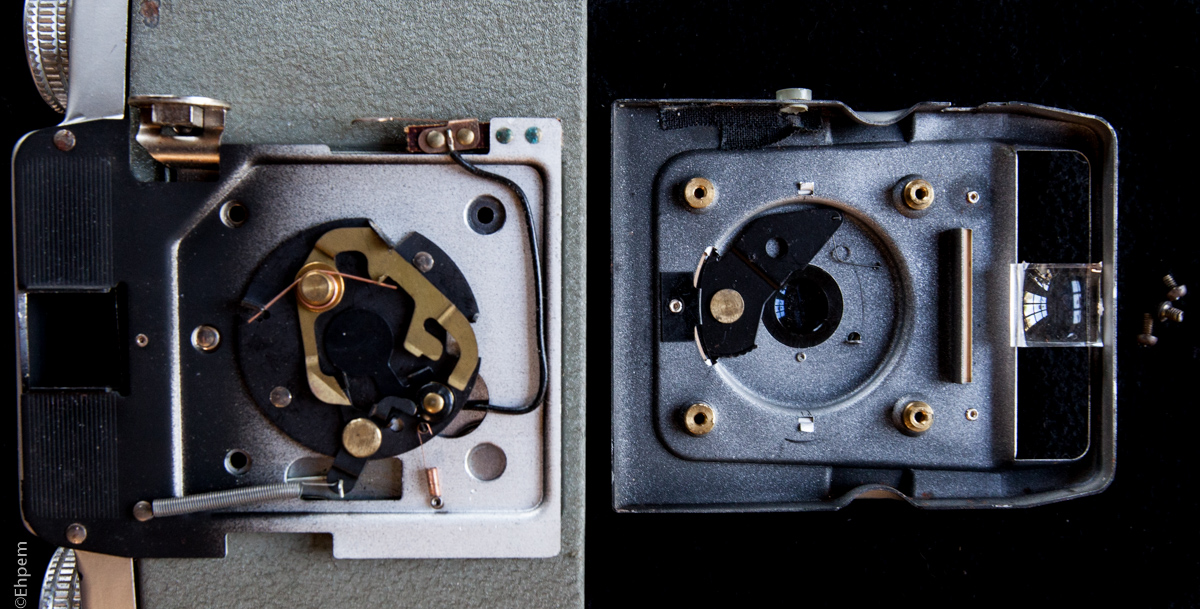
When the Phillips head screws are removed the lens board lifts off exposing, at the bellows end, the shutter mechanism and, on the inside of the lens board, the aperture mechanism. If you have to maintain the shutter or the aperture then they are very easily accessed. Fortunately there was nothing that needed doing to either of these parts on my camera but I have included detailed photographs in the gallery below so that readers with a broken mechanism can see how it should look.
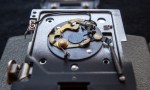
Access to the inside of the lens is less simple. The lens board turns out to be a riveted sandwich of two layers of sheet metal holding the labelled scale focus ring in place. The labelled ring must be removed to separate the lens elements. This means that three rivets have to be removed to clean the inner surfaces of the lens – the rivets in question each have their heads showing on the front of the lens board – two at the top and one below the lens. The lower one also secures a small piece of black sprung steel that I am guessing provides friction for the aperture dial to prevent accidental switching.
On the inside of the lens board the rivets have a dimple in their center. I decided to drill them out and used the smallest drill bit available at home, which was 1/16th”. It was the perfect size and a bit of drilling loosened the rivets enough to remove them. Once removed, the front plate with the camera name on it could be removed from the inner layer. The outer layer fits over a flange on the scale focus ring and holds it in place. However, it is also held in place by bending two small tabs on the inner surface of the lens board. These tabs seem fragile and I can easily imagine they would break with more than a few bends back and forth.
The scale focus ring also prevents the front element from being unscrewed beyond the focus range. Once the labelled ring is removed the outer element of the lens can be unscrewed – it is a left hand thread so unscrews clockwise. Unscrewing it reveals the inner lens surfaces and cleaning is then easily done.

Two parts of the lens separated. Reverse or left-handed thread joins outer lens/focusing mechanism to inner lens
The threaded assembly that holds the lens together is also the focus mechanism. Turning the outer knurled ring moves the outer element relative to the inner element. I expect that this camera could be hacked to allow photos to be taken much closer than 4 ft by giving the outer ring enough room to extend further when unscrewing it since it unscrews away from infinity. On my camera the focus had a place where it was particularly stiff. I cleaned the threads and used fine oil to lubricate them. The fine oil was the nearest available – literally at the end of my nose. My great-uncle taught me to lube the joints on his split cane fishing rods by rolling the male end on the side of the nose. I figure that should work here too, though I used my finger for application, rather than my face!
The lens board also holds a plastic lens for the view finder. This lens slides out with the bellows to bring the scene in focus. Once this lens is popped out (or falls out when the rivets are removed), the inner surface of the rear view finder lens can be reached for cleaning through its opening.
Assembling the camera is pretty straightforward. The trickiest part is (a) remembering to screw the outer lens ring on “backwards” or counter-clockwise and (b) starting the threads at the right place so that the red dot on the outside of the ring rests beside infinity when the ring is screwed all the way in. Also, inserting the sprung steel doodad and holding it in place while inserting the bolt at the bottom of the lens board was fiddly.
I do not have necessary tools for riveting, so I settled on small brass bolts to hold the parts of the lens board together. I chose bolts because they are easily removed if my repairs are not good enough, and can be readily replaced with rivets should a future owner care for such details. I used brass because that is the material my local hobby/model shop had in the diameter (1-72) I needed. The bolts were a bit long (1/4″ were what I bought, but probably 1/8″ would work, though might be tricky to thread on to the nuts). I had to trim the ends of the bolts once installed to allow the board to seat fully on the bellows unit.
So, now it is time to run some film through the camera. I have decided to test it with a roll of Ilford Delta 100 that expired in 2008. This adds variables to the testing, but should not be too complicating. I will shoot some frames in the B&W mode which was probably designed for ISO125 film and some in the Colour mode which was probably designed for ISO32 film. I would imagine that given a decade of uncertain storage the Delta 100 should be shot at ISO50, so the colour setting may be just right for this film. But if the film aged well, then the B&W setting should be close enough. The window on the back of the camera has a pale yellow filter in it. It does not look opaque enough to me, so I will cover it with a bit of tape. I will post the results in a few days – wish me luck for smooth operation and no light leaks!
To view images in detail click on any image and then click on the arrows or swipe to navigate.
-

- Top view – red is shutter reslease
-
- Front view
-

- Detail of dust in lens
-

- Back view, closed
-

- Front metal bellows extended
-
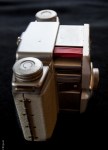
- Shutter side view, bellows extended
-

- Flash side view, bellows collapsed
-

- Front view with flash
-
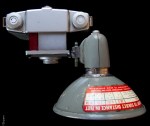
- Top view with flash
-
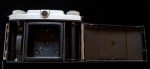
- Rear view, opened
-

- Detail showing three screws that need to be removed first, two at top in corners, one lower left corner
-
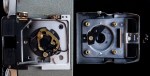
- Front of camera with lens board removed – held on with just 3 screws access to shutter and aperture mechanisms is easy
-
- Shutter detail – single speed 1/30th on this camera
-
- Lens board detail, aperture set to “Color”
-

- Lens board detail, aperture set to “B&W”
-
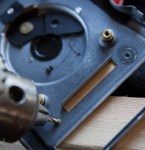
- Three rivets on back of lens board need to be drilled out
-
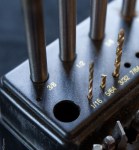
- A 1/16th drill bit was the right size
-

- Dismantled lens board with lens opened up
-
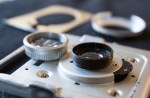
- Two parts of the lens separated.
-

- These are the brass bolts that I used to replace the rivets
-

- All back together, most of the dust gone, a bit on the outside.
-
- Ready to shoot


just picked up a color clipper, and unfortunately need to get inside to the shutter. glad to see it is so easily accessed. do you have any advice for fixing a sticky shutter? thank you for the article and great process photos!
LikeLike
Hi Orion – good luck with your color clipper! I am not really up on shutters as they are beyond my pay grade. I would suggest you clean up all the related mechanics which are simple on this camera. If that does not fix the shutter then I guess it is likely to either be old sticky lubricants or something is out of alignment. It is a simple shutter so it might be possible to strip it down and clean old lube off of it, or to even clean it off with a solvent without taking it apart. If taking it apart, place the parts in a pattern so you can reassemble in correct order – take photos as you take it apart, and so on. Sorry I can’t be more specific than that. The other option is to figure out what shutter speed it is operating at in normal conditions and just live with it – shoot an appropriate speed of film for the shutter speed, etc. Good luck!
LikeLike
Pingback: Testing the Ansco Color Clipper | burnt embers
It certainly has a fifties look – it will be interesting to see what happens with the film…impressive that you got in there and cleaned the lens!
LikeLiked by 1 person
Thanks Lynn. If it had been much more difficult, I would not have been trying. I did have to think about it for a few days before taking the plunge. The film is still in my coat pocket – I forgot to drop it off when downtown today. Sigh.
LikeLike
Like I forgot to think about exposing for the shadows instead of highlights when I started the roll. Yes, oh well. I’m about half way through the roll so we’ll see.
LikeLiked by 1 person
I suspect that the point and shoot light meters tilt towards the shadows with their exposures – most of the ones I use really nail the exposure.
This camera on the other hand, who knows how it will do. I shot pretty much every setting using both apertures as a test, and all of them in bright sunny light. I can’t imagine it would do too well in anything but ideal conditions. We’ll see soon enough. The film is ready to be picked up.
LikeLiked by 1 person